

 Čeština
 Deutsch
 日本語
 Français
 Español
 한국어
 简体中文
 Italiano
 Português
 Nederlands
 Polski
 繁體中文
 Svenska
 Türkçe
 العربية
 Українська
 Dansk
 Norsk bokmål
 Suomi
 עברית
 Română
 Magyar
 Ελληνικά
 Hrvatski
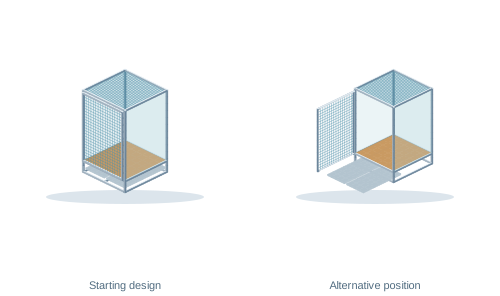
What to measure before designing
Measure between finished surfaces and allow for your actual equipment. Note the openings and passages through which the assembly must fit.
Measure the wall space and the passage required around the aviary.
Allow room in front to withdraw the lower trays completely.
Compare overall height with the doorway and maintenance reach.
A clear floor footprint is insufficient if the trays cannot be removed at the front. Panel suitability depends on the animal.
Starting template dimensions
120 × 120 × 200 cm
These are the initial design values in the order of its dimension fields, not automatically its usable internal space. Check each axis meaning in the template labels.
From measurements to your own design
- Open the matching template.Inspect its details, starting dimensions and supported material options. Choose the option you intend to use.
- Adjust dimensions to your measurements.Use the dimension fields or dimension labels in the template details. Follow the field names and include a unit such as cm. Compare the entered values with the updated preview.
- Insert the design and inspect it from every side.Switch panels and infills on and off to inspect the frame itself. For a moving design, check its individual positions. Follow the editor instructions before another dimension change.
- Save your own assembly.After checking dimensions, save the project. Prepare the parts list and drawings from the adjusted assembly, not from the original example.
What to check in the completed design
- Check separate access to both lower trays.
- Inspect the transparent sides and mesh front with panels enabled.
- Compare openings and access with the equipment inside.
This guide helps plan the dimensional layout. Actual materials, hardware, attachments and load capacity depend on the finished construction; the preview alone does not establish them.
Fit the design to your space.
Open the starting template and enter values from your own measurements. The link keeps the standard starting construction.
Open the template in CAD ↗View template details →